Are you looking to buy BetaFPV BEC Board for GoPro Hero in Australia?
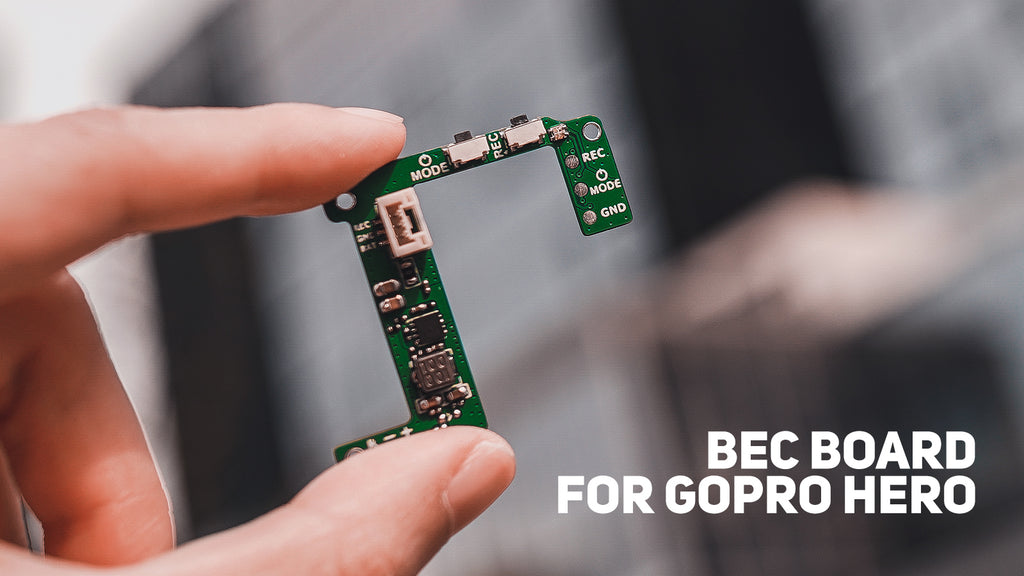
BetaFPV BEC Board for GoPro Hero will fix all unwanted problems from not having solid amount of power or having a heavy sluggish GoPro. It integrated 5V@2A BEC, stock GoPro buttons and LED, pluggable connectors and remote recording
The BEC Board has been upgraded to the V1.1 version. With the new version, we don’t need to use 2 shims when assembling the BEC board on the GoPro motherboard, which can solve the problem that the two interfaces may loose when locked
This BEC board fits for GoPro Hero 6 and Hero 7 Black. But NOT for Hero 8.
Specifications
- Item: BEC Board for Naked Camera
- Weight: 1.48g
- Output: 5V@2A
- Input Voltage: 2-4S
- Connector: GH 1.25 3P Connector
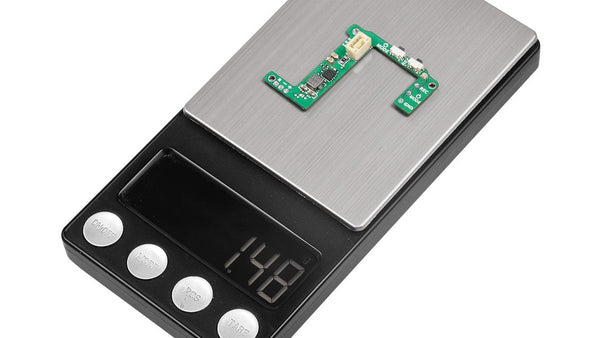
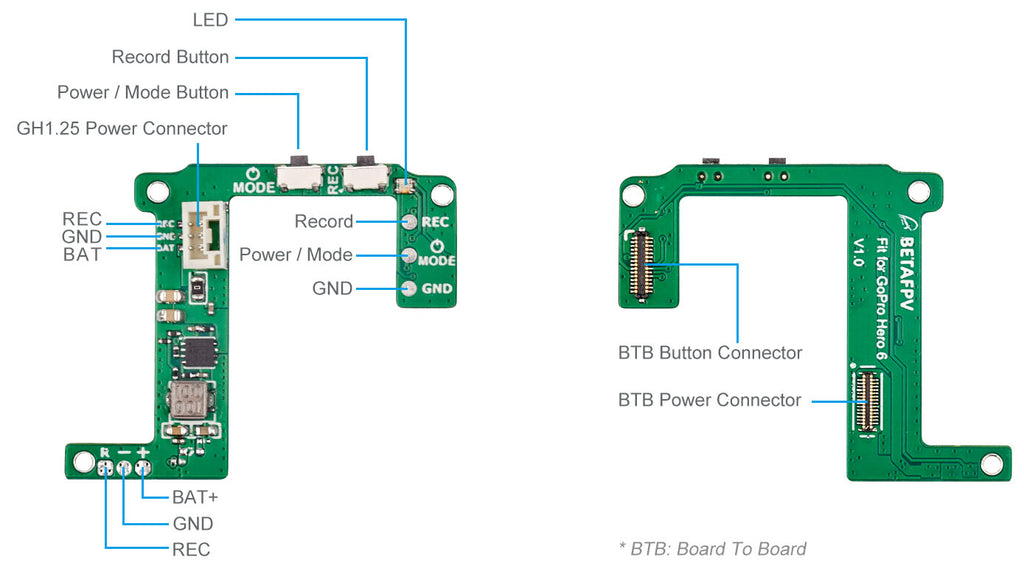
Diagram of BEC Board
The two buttons on the BEC board has the same function as the stock GoPro buttons. Three actions we will use frequently.
- Power On - Press the Power/Mode button and the LED flashes three times and light off.
- Start Record - Press the Record button once and LED flashes slowly. If LED flash once and light off, it means there is no SD card.
- Stop Record - Press the Record button and LED stop slow flashing.
LED Status
Under normal operation, plug the GH1.25 connector into the GoPro Lite camera firstly, then connect with the battery. The LED will flash once, then you should press the Power / Mode button once in a second to power on. The LED on the BEC board has the same status as the stock LED on the GoPro mainboard.
| Indication | Button Operation | LED Status |
| Power On | Press the mode button once | Flash 3 times and light off |
| Power Off | Press the mode button for 5s | Flash 7 times and light off |
| Start Record | Press the record button once | Continuously slow flash |
| Stop Record | Press the record button once | Flash 3 times and light off |
| Photo Function |
Press the mode button and switch to photo function, then press the record button |
Flash once |
How to Setup Remote Record
Pilot could use the switch on radio transmitter to start/stop record. Some more configuration needed.
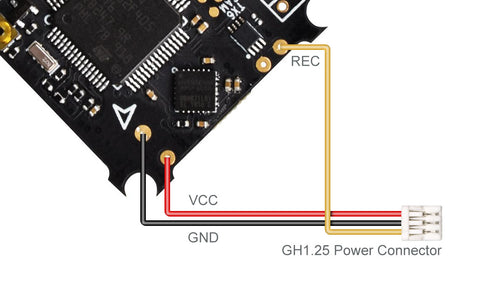
We use the Pinio function in Betaflight to control record. First, setup the Pinio function of the B12 pin in the FC board.
resource FLASH_CS 1 NONE
resource PINIO 1 B12
set pinio_box = 40,255,255,255
save
Next, map one of the switch channels in your radio transmitter to this Pinio (aka USER1). As shown below, we map the AUX4 channel in the radio transmitter to USER1 Pinio. The cursor in the orange zone means button released and white zone means pressed. So keep the cursor in the orange zone in default.

Third, check if the Pinio function works. Change the switch and make the cursor move from the orange zone to the white zone, and finally back to the orange zone. Now you could check the LED status to know if the record starts. Use the same process to stop recording.
If you use the 12A F4 AIO FC board, like the 85X whoop drone, you will use the LED_STRIP pin (aka A08 pin pad) for the Pinio function.
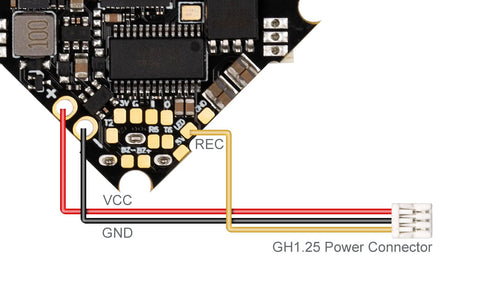
resource LED_STRIP 1 NONE
resource PINIO 1 A08
set pinio_box = 40,255,255,255
save
Know more about the Betaflight Pinio function.
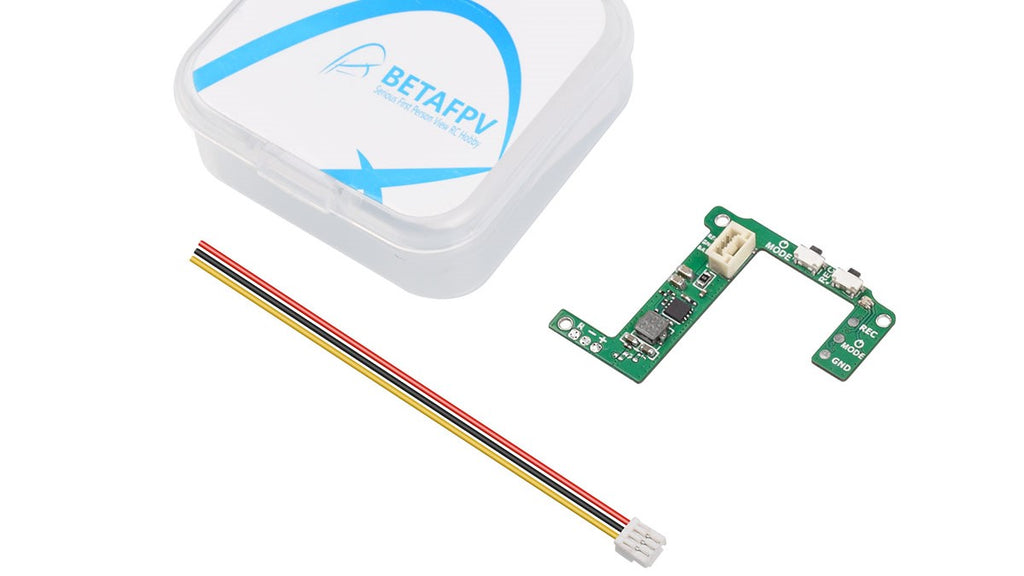
Whats included:
- BEC Board for Naked Camera
- H1.25 Power Cable (80mm 30AWG)
We know some of the pilots might have a question about how to get the case for the naked GoPro or some might wanna grab the GoPro Lite Camera directly. Here we provide some more choices for your better installation. You can also find the STL File for GoPro Lite Series here.
View all our related Gopro Lite products
Click here to check the STL Files for GoPro Lite Series.
Browse more
Browse all BetaFPV


